Add the Rewards page
When this step is done, customers have somewhere to see their points and claim a reward.
In EarnKit: Onsite › The Rewards page in customer accounts
This is the one display customers can navigate to themselves, and the only row on the checklist marked Required. It gives them their points balance, their birthday reward, any follow rewards they can claim, and the discount codes they have already redeemed.
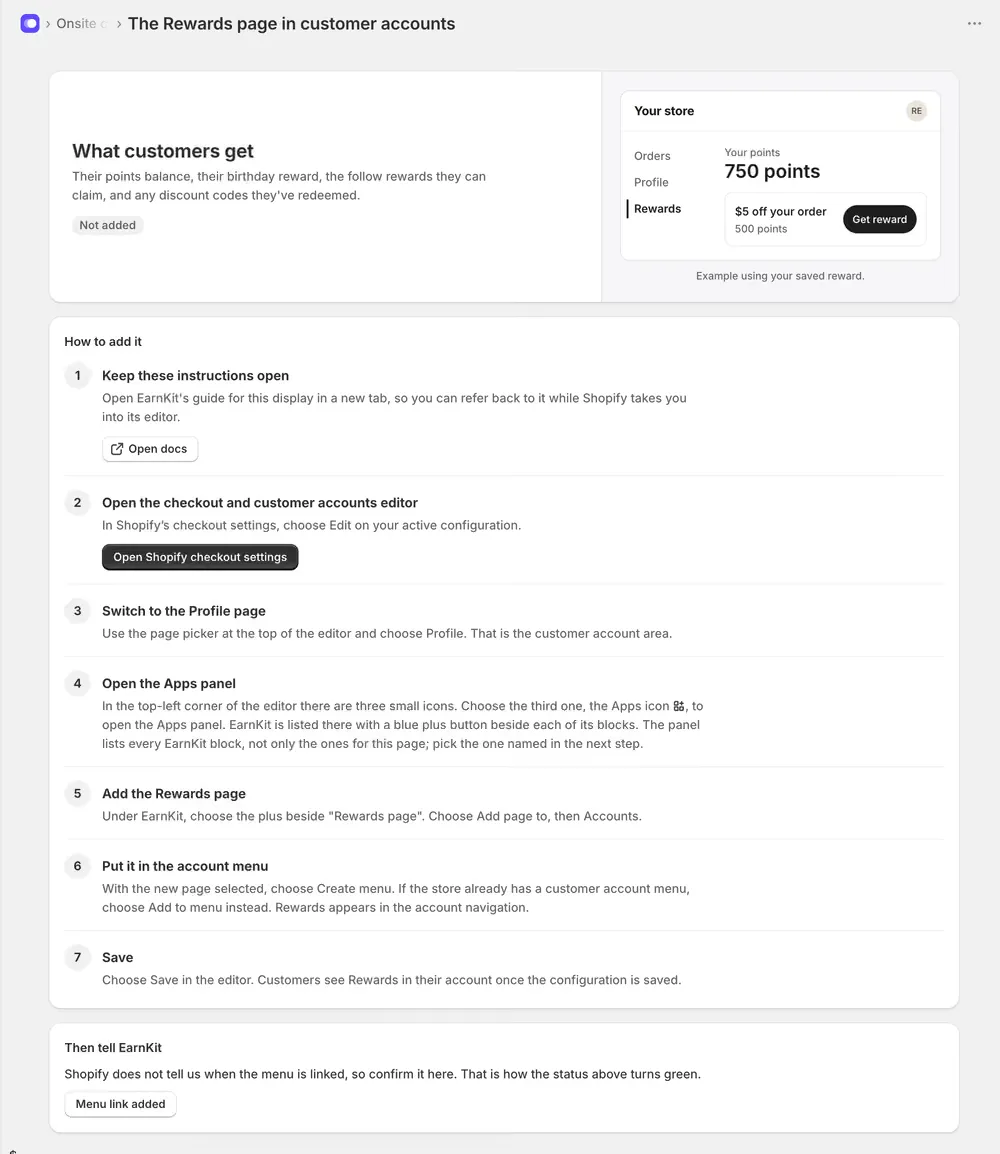
EarnKit’s setup page walks you through it and keeps its own status. The preview on the right uses the reward you actually saved, so it is what your customers will see.
Finding this page again
In EarnKit’s sidebar, choose Onsite. The page it opens is titled Onsite content, and it lists every display EarnKit can add. Choose Set up on The Rewards page in customer accounts, or View setup once it is done.
The setup page is not in the sidebar itself. The other way in is the setup checklist on Home, where the Add your Rewards page row opens the same place.
Before you start
Your store needs Shopify’s current customer accounts. On legacy accounts the page cannot appear at all.
Add it in Shopify
The work happens in Shopify’s checkout and customer accounts editor, not in EarnKit. Open Shopify checkout settings takes you there; choose Edit on your active configuration.
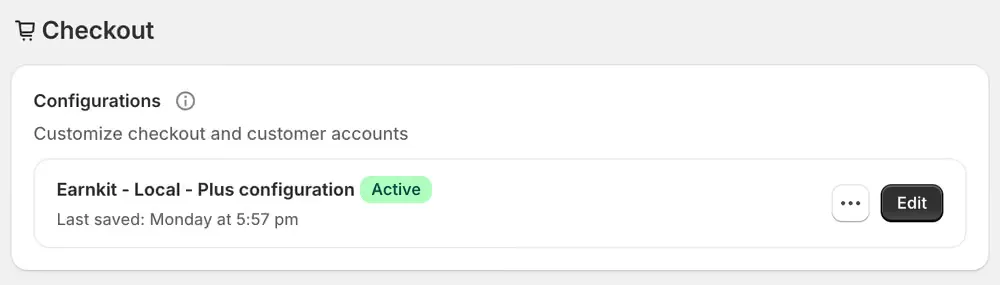
Then, inside the editor:
-
Switch to the Profile page. Use the page picker at the top of the editor and choose Profile. That is the customer account area.
-
Open the Apps panel. In the top-left corner there are three small icons. Choose the third, the Apps icon.
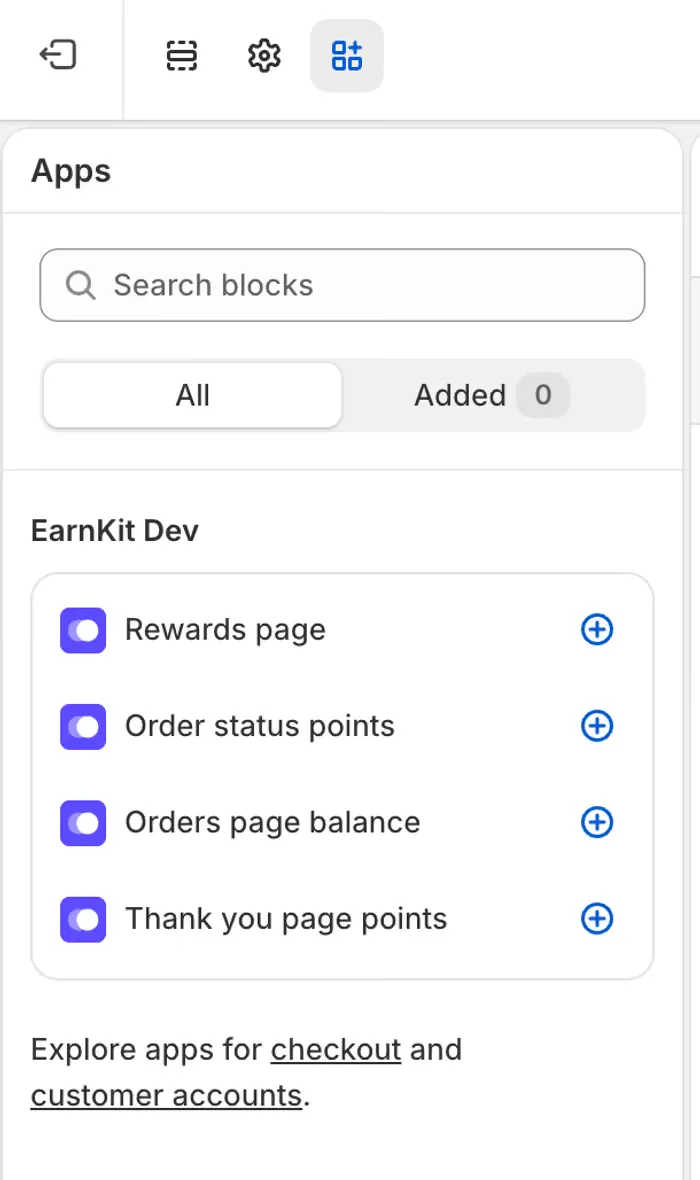
EarnKit is listed there with a plus beside each of its blocks. The panel lists every EarnKit block, not only the ones that belong on this page, so take the name from the next step rather than picking the first one.
-
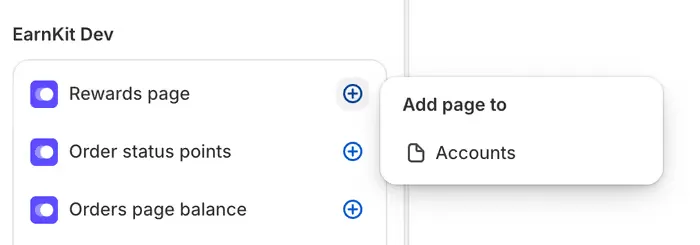
Add the Rewards page. Choose the plus beside Rewards page, then Accounts under Add page to.
-
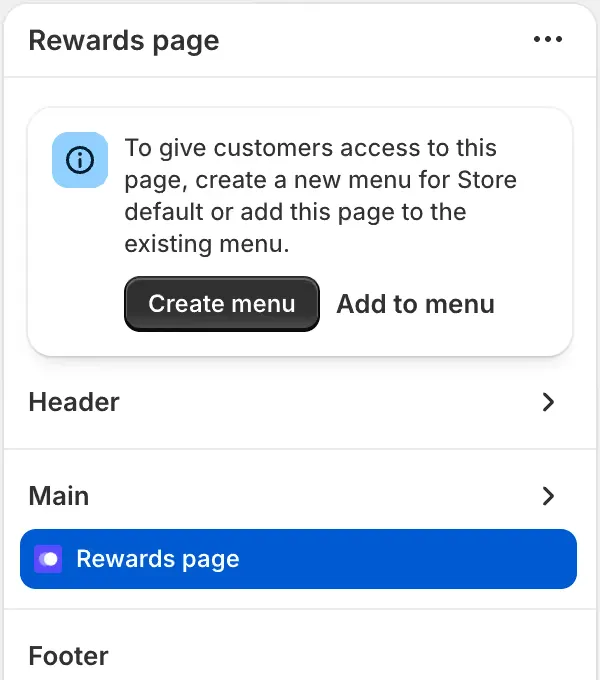
Put it in the account menu. The editor says the same thing EarnKit does: customers cannot reach the page until it is in a menu. Choose Add to menu if your store already has a customer account menu, or Create menu if it does not.
-
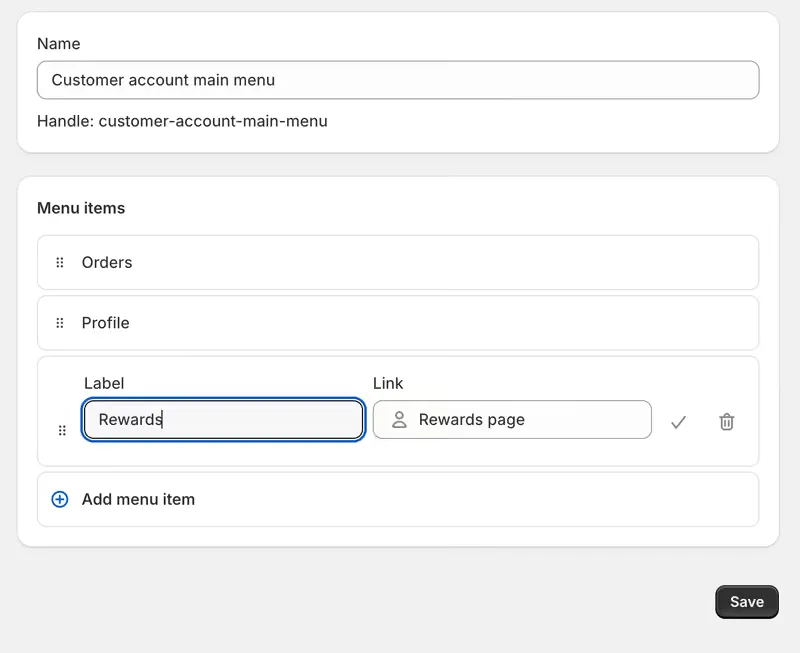
Name the menu item and save it. The account menu opens with a new item added. Its Link is already set to the Rewards page; what you type in Label is the word customers see beside Orders and Profile. Rewards is the obvious choice. Then choose Save.
-
Save the editor too. The menu and the configuration save separately. Customers see Rewards in their account once the configuration itself is saved.
Once it is added, the editor shows the real page with example figures in it: the points balance, the reward that is ready to use, and the ways a customer can earn.
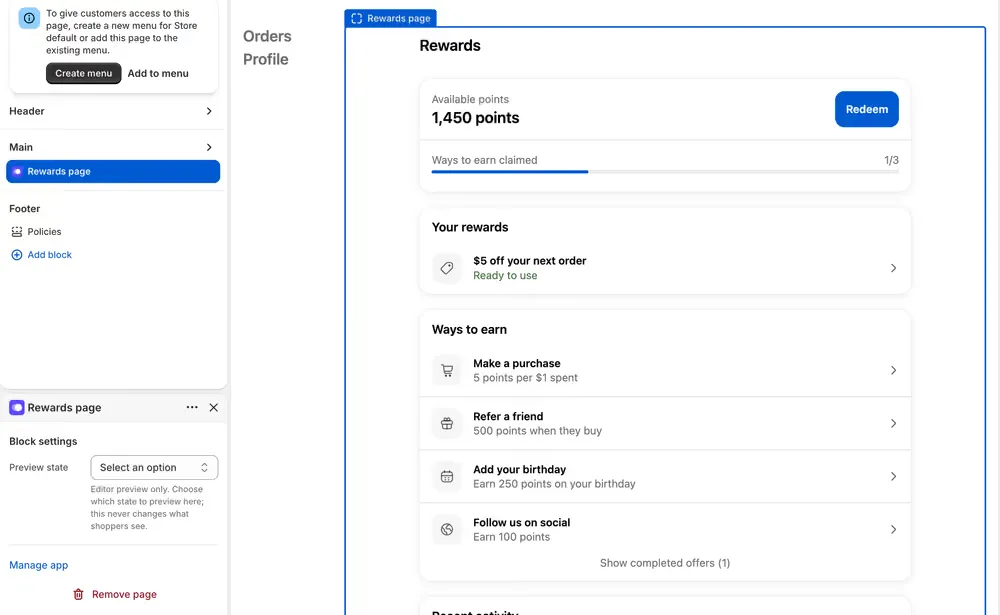
Preview state in the block settings only changes what you see while editing. It never changes what a customer sees.
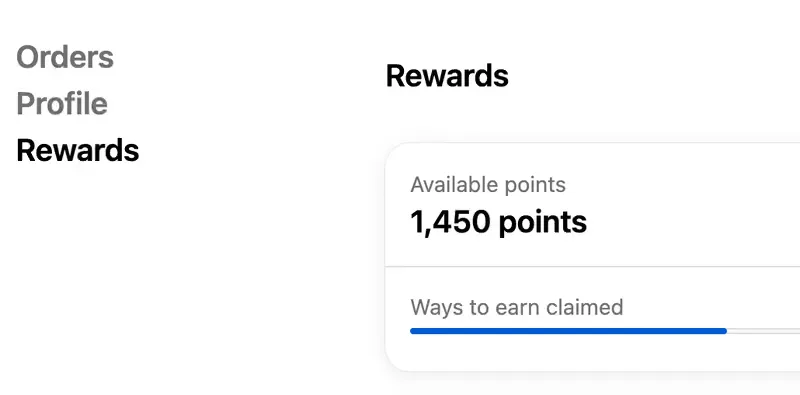
Once the configuration is saved, Rewards sits in the account navigation beside Orders and Profile, and that is how customers reach it.
Adding the menu item by hand
If you are adding Rewards to a different menu, or the menu item did not come across, you can add it yourself. In the menu, choose Add menu item, then open the Link field.
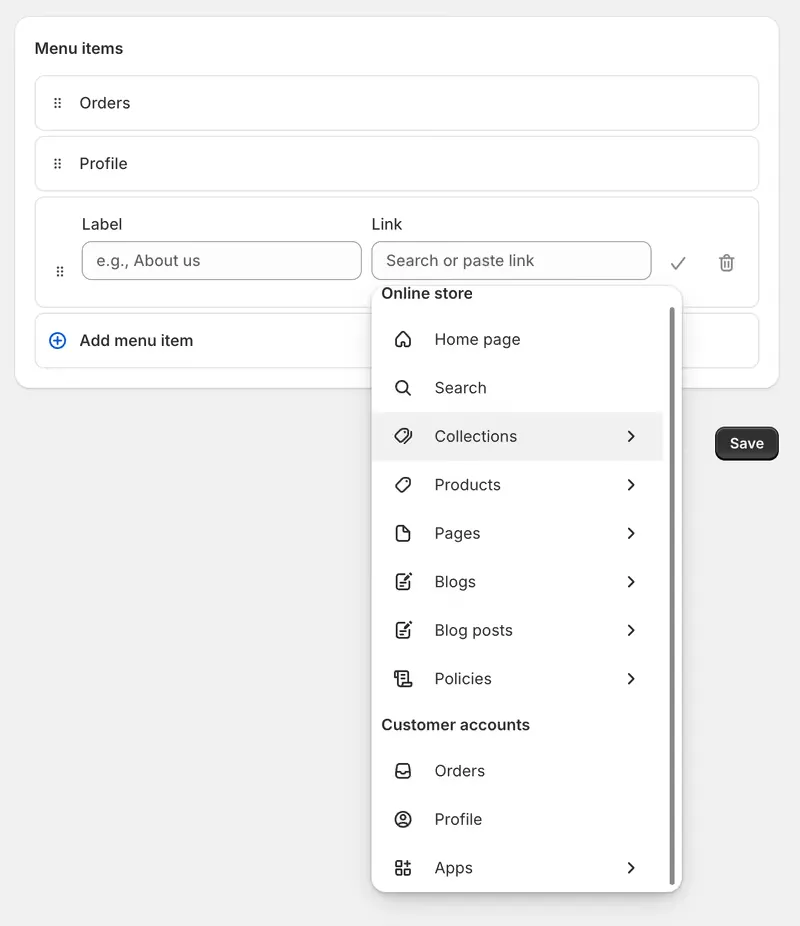
The Rewards page is not under Pages. It is an app block, so it lives under Customer accounts › Apps.
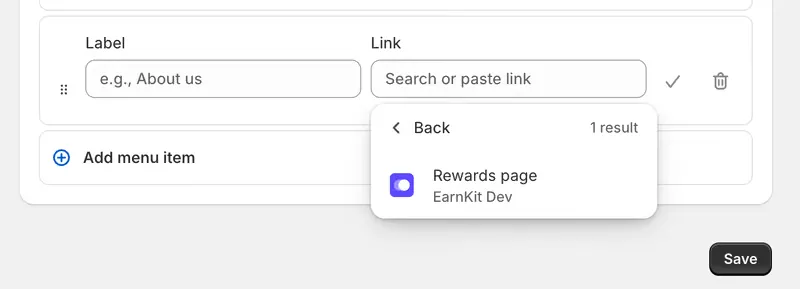
Choose it, set the Label to Rewards, confirm the row, and save the menu.
Changing it later
The menu is Shopify’s, not EarnKit’s, so you edit it in Shopify: Content › Menus, then Customer account main menu.
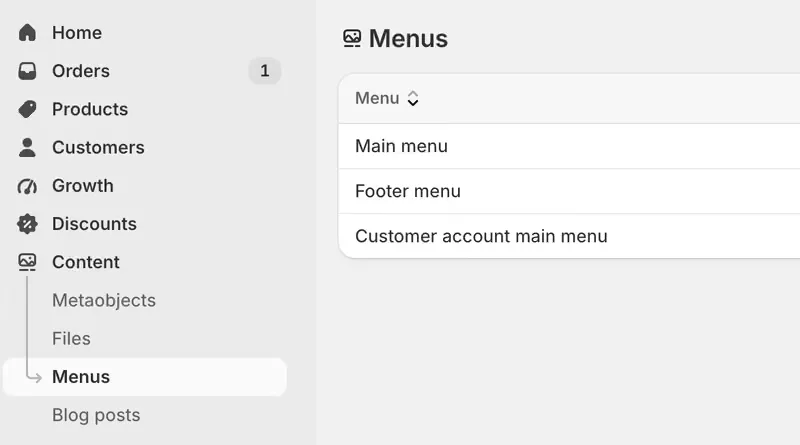
Rename the item, reorder it, or remove it from there. Removing it does not delete the Rewards page; it only takes away the way customers reach it, and the setup row in EarnKit will not notice.
Then tell EarnKit
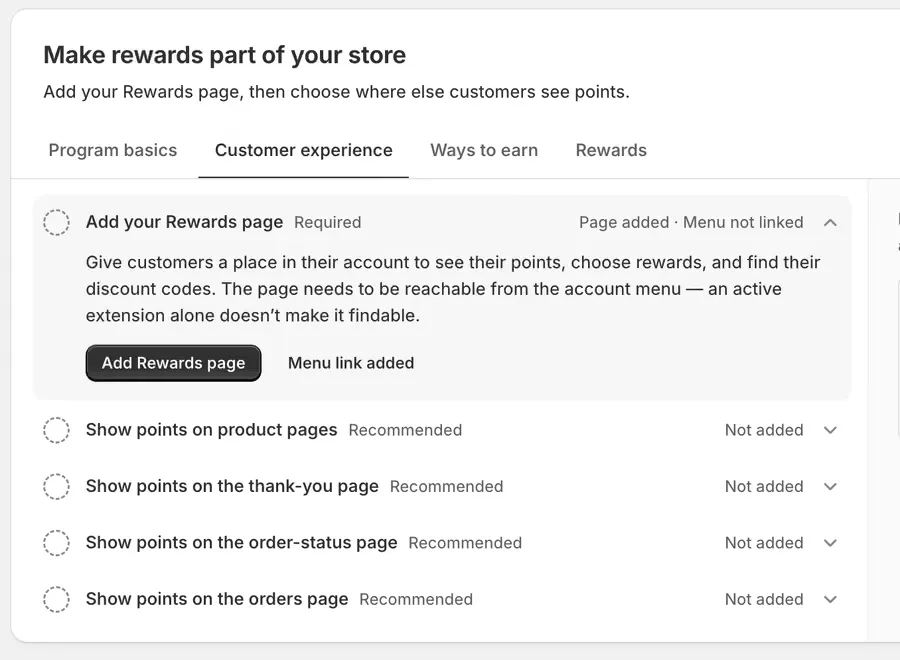
Shopify does not tell EarnKit when a menu is linked. EarnKit can see that the page renders, but not whether anything points at it, so after you add the page the status reads Page added · Menu not linked.
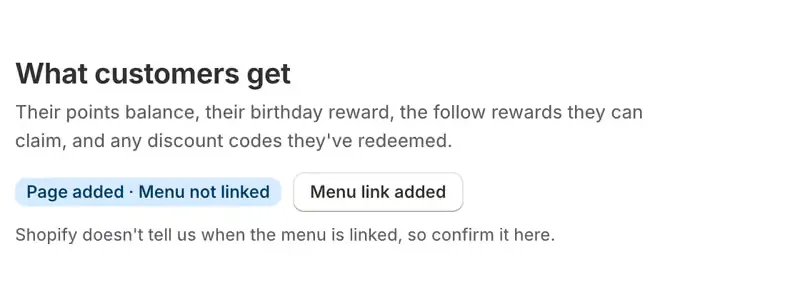
Choose Menu link added to confirm you have done it. Nothing else clears this status, and until you do, the row stays incomplete even though your customers can already reach the page.
The same status and the same button appear on the setup checklist on Home, so you can confirm from whichever one you are looking at.
Good to know
- Adding the page and linking it are two separate things. An active extension that nothing links to is a page nobody will find.
- If you later change your checkout and customer accounts configuration, the Rewards page has to be added to the new one.
- If customers still cannot find it, check the account menu first: the page renders whether or not anything links to it, so an unlinked menu is the usual cause.