Make rewards part of your store
When this step is done, customers can find their points and claim a reward.
In EarnKit: Home
Your program is running, but nothing about it is visible yet. This is where you change that.
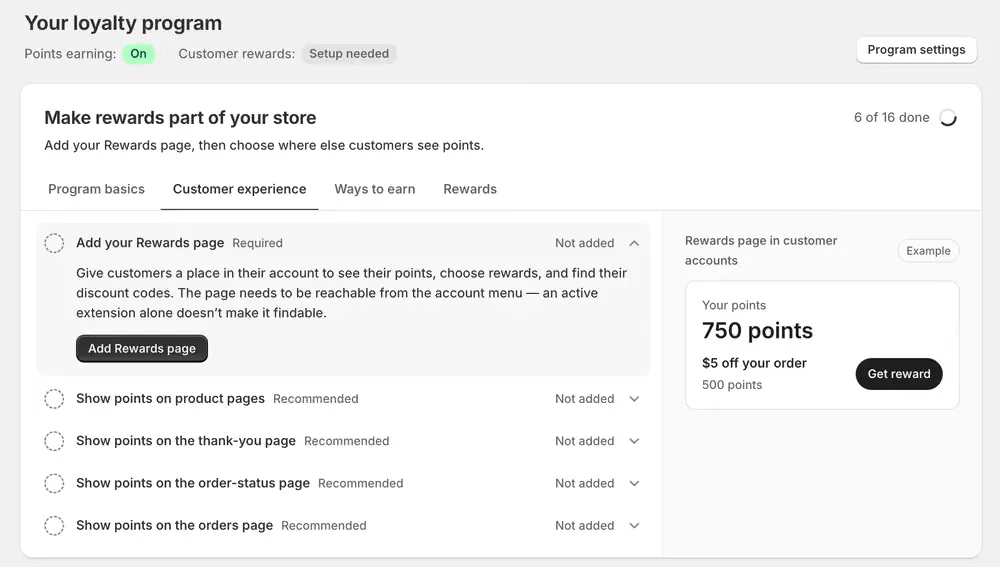
The two labels at the top of your dashboard tell you where you are. Points earning: On means orders are earning. Customer rewards: Setup needed means customers cannot reach those points yet.
The checklist
The rest of setup lives in a checklist on your dashboard, grouped into four tabs. A counter shows how much is done across all of them.
| Tab | What it covers |
|---|---|
| Program basics | Your points rate, first reward, starting balances and whether earning is on |
| Customer experience | The Rewards page, and where points appear as customers shop |
| Ways to earn | Purchases, and the bonus ways such as welcome, birthday, social follow and referrals |
| Rewards | The rewards customers can choose |
Work through Customer experience next. Anything that does not suit your shop can be marked Not needed, and it stops counting against you.
Add your Rewards page
This is the only row marked Required, because it is the one place customers can navigate to themselves. It gives them somewhere to see their balance, choose a reward and find the discount codes they have already claimed. The panel beside the checklist shows an example of what they get.
Add Rewards page walks you through adding it in Shopify’s checkout and customer accounts editor.
Adding the page is not enough on its own. It also has to be reachable from the account menu: an active extension that nothing links to is a page your customers will never find. EarnKit can tell that the page renders, but it cannot see your account menu, so it asks you to confirm with Menu link added once you have saved.
Choose where else points appear
The other four rows are Recommended rather than required. Each one puts points somewhere a customer already looks:
- Product pages, showing what an item would earn before they buy.
- The thank-you page, immediately after they order.
- The order-status page, when they come back to check on an order.
- The orders page in their account.
Add the ones that fit your shop. None of them is needed for the program to work, and each is added separately.
As you go
Rows tick off as you finish them, and the counter at the top moves. Once the Rewards page is added, the card itself changes: the heading becomes Help customers discover their rewards, because the required part is behind you and the rest is about where points show up.
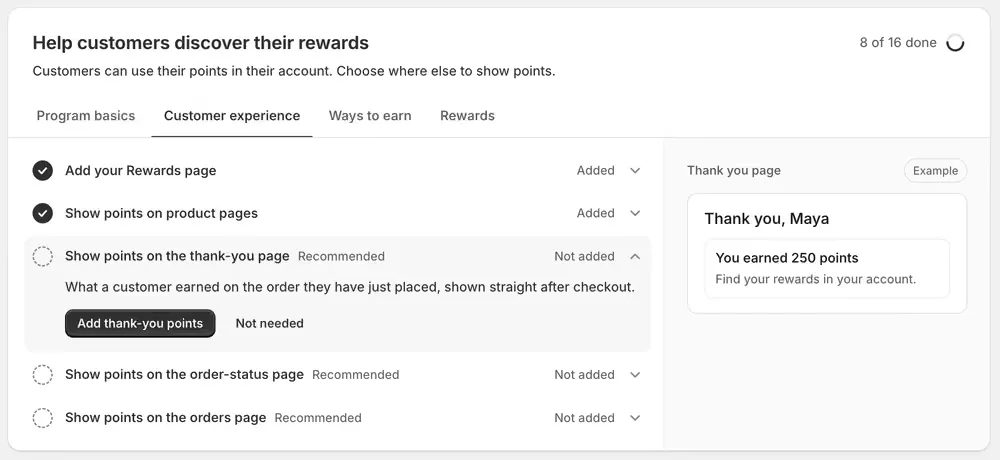
Rows you do not want are marked Not needed rather than left undone, so the counter reflects the program you meant to build.
When this part is done
With the Rewards page added and the displays you want in place, every row in Customer experience reads Added, and the label at the top of your dashboard changes from Customer rewards: Setup needed to Customer rewards: Available.
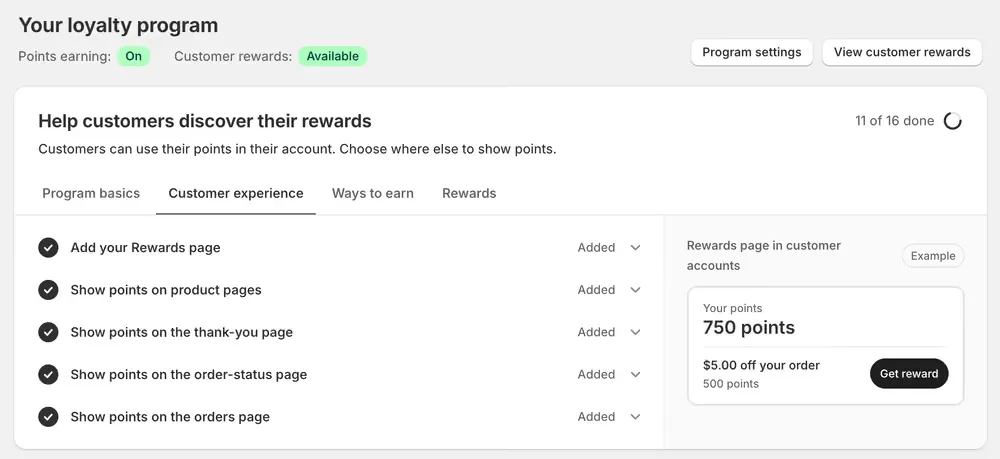
That is the moment the program is genuinely running: points are being earned, and customers can see them and spend them. The remaining tabs, Ways to earn and Rewards, are about adding to a program that already works.