Give existing customers a starting balance
When this step is done, the customers you already have are not starting from nothing.
A customer who has shopped with you for two years, then opens their Rewards page to find zero points, has been told their history does not count. This step is how you avoid that.
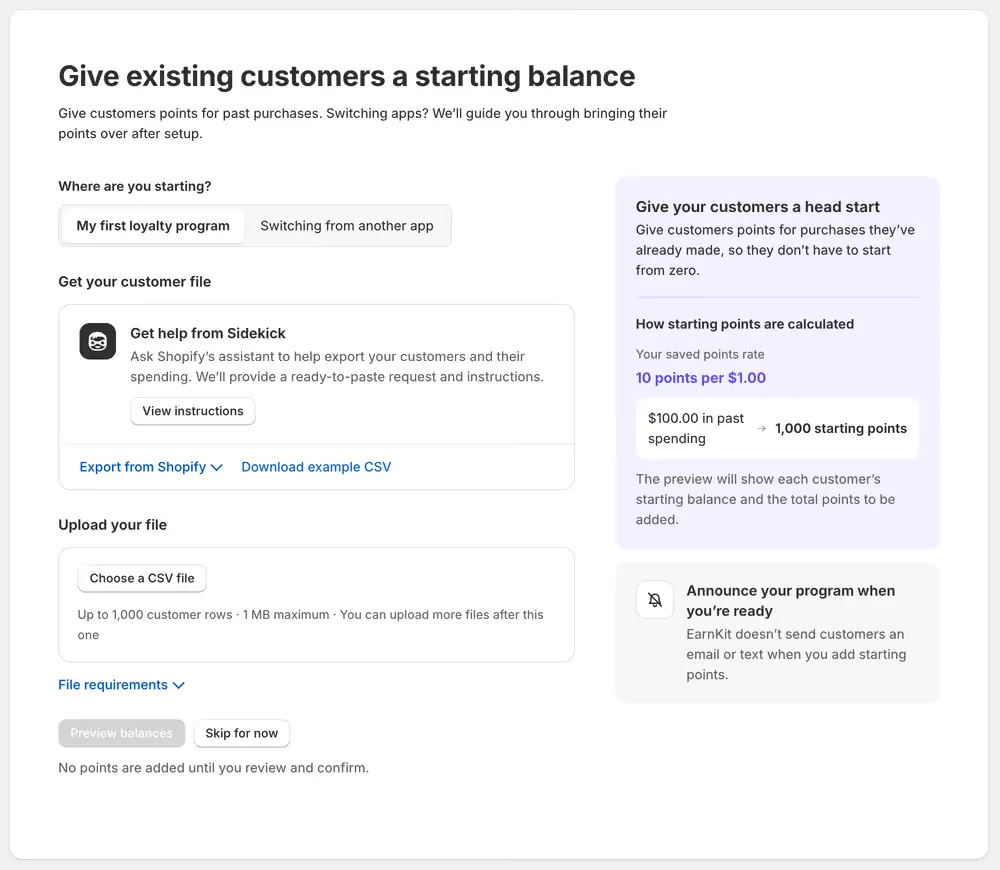
Where are you starting?
My first loyalty program is the path below: upload what your customers have spent, and EarnKit works out their points at the rate you just saved.
Switching from another app takes nothing now. Finish setting up your program first, and EarnKit then helps you bring the balances over and check what they buy under your new rewards. Choosing it does not turn your program on.
Get your customer file
You need a file of customers and what they have spent. There are three ways to get one:
- Get help from Sidekick. Shopify’s assistant can export your customers and their spending. View instructions gives you a request to paste and the steps to follow.
- Export from Shopify yourself: open Customers, choose Export, pick All customers, select Plain CSV file, then Export customers. Exporting more than 50 customers sends the file to you by email rather than downloading it.
- Download example CSV to see the shape EarnKit expects before you build your own.
What Sidekick gives you
Pasting the request from View instructions asks Sidekick for two columns, customer_id and
total_spent, one row per customer and no totals row. It runs the query and hands back a CSV to
download.
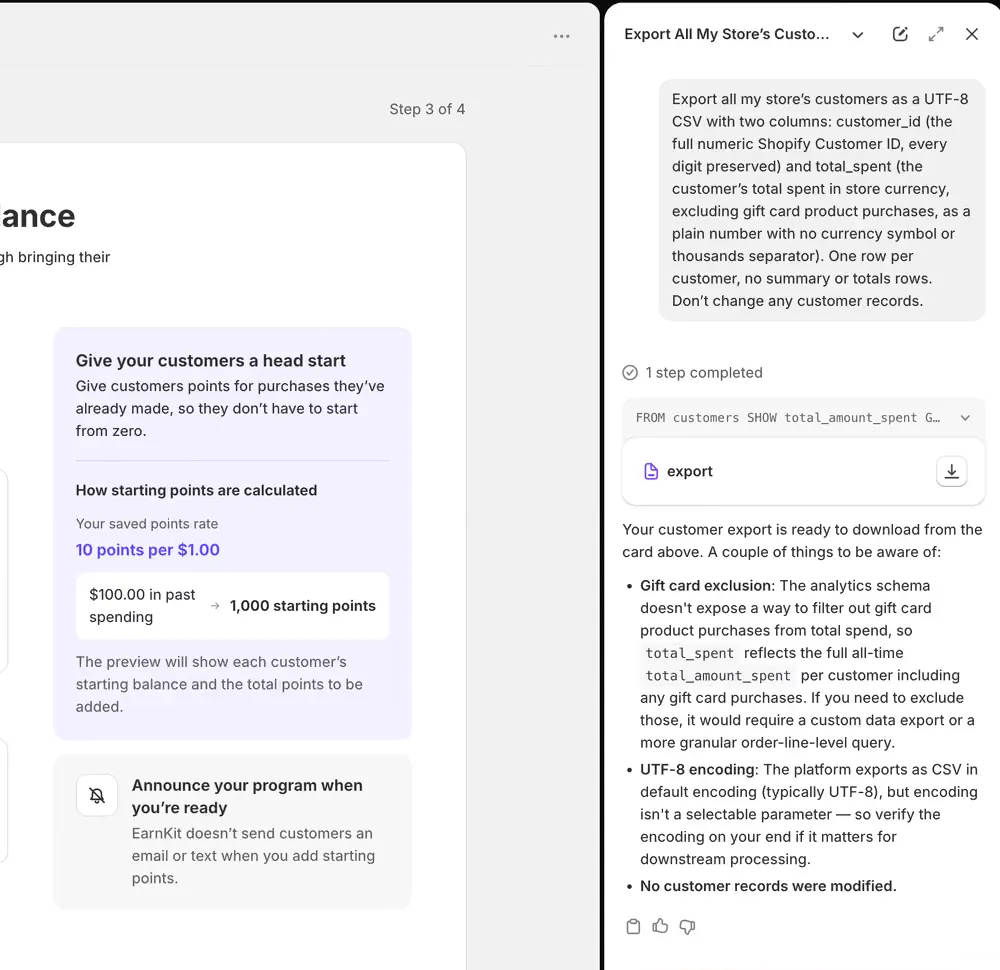
Read what Sidekick says back before you upload. It reports what it could and could not do, and one limit matters here: its total spent figure includes gift card purchases, because Shopify’s analytics cannot filter them out. EarnKit’s own earning excludes gift cards, so starting points worked out from that file are slightly generous compared with how the same spending would have earned. That is usually fine for a head start. If it is not, edit the amounts before uploading.
Sidekick only reads. It does not change any customer record.
Upload your file
Choose a CSV file of up to 1,000 rows and 1 MB. A larger list is not a problem: split it and upload the rest afterwards, and customers already imported are skipped rather than counted twice.
Each row needs a Shopify Customer ID. An email address cannot identify a customer here. File requirements on the screen lists the columns in full.
Check before you commit
Preview balances shows what each customer would get, before anything is added.
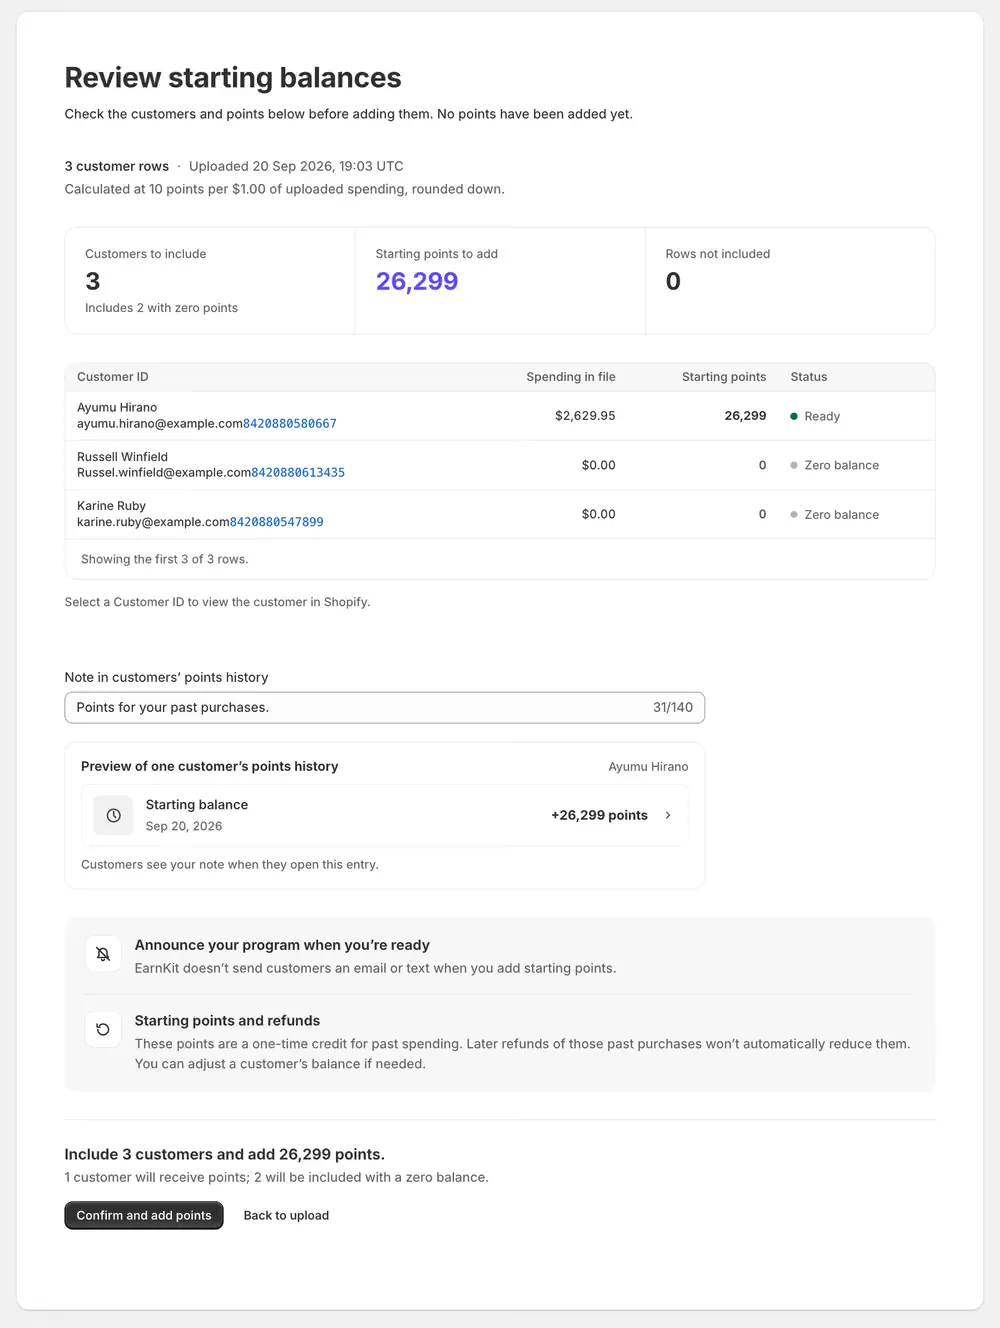
Starting points use the rate you saved in the previous step, rounded down. At 10 points per $1.00, a customer who has spent $2,629.95 starts with 26,299 points.
Three numbers run across the top: how many customers will be included, how many points that adds in total, and how many rows were left out. A customer whose file row shows no spending is still included, with a zero balance, so they exist in your program from day one.
Select any Customer ID to open that customer in Shopify, if a row looks wrong.
The note customers see
Note in customers’ points history is up to 140 characters, and it is what a customer reads when they open that entry on their Rewards page. The preview underneath shows exactly how the entry will look. The default, “Points for your past purchases.”, is usually enough.
Starting points are a one-time credit for past spending. If one of those past orders is refunded later, EarnKit does not take the points back automatically, because it has no record of which orders the figure came from. Adjust that customer’s balance by hand if you need to.
Confirm and add points is the point of no return; Back to upload returns you to the file.
After you confirm
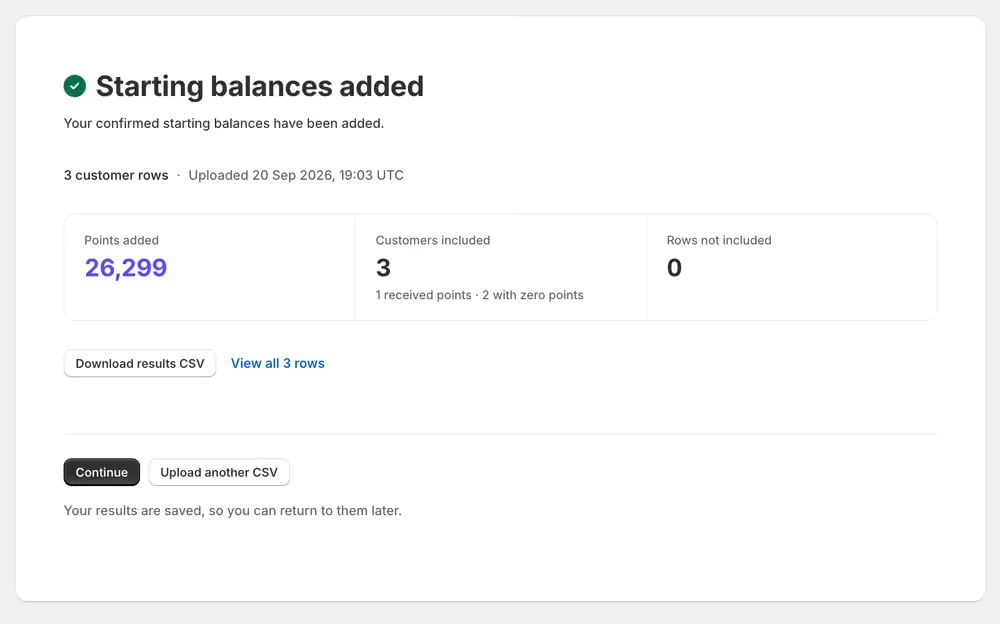
The same three numbers come back as a result rather than a forecast, and Download results CSV saves them. Keep that file: it is your record of which customers were credited and with how much.
The heading tells you whether anything was left behind. Starting balances added means every row went in. Import complete means some did not, and the line underneath says how many. View all 3 rows shows each customer and what happened to them.
Upload another CSV adds more customers, which is how you handle a list over 1,000 rows or fix the rows that were left out. Continue moves on to the next step. Your results are saved either way, so you can come back to them.
EarnKit does not email or text your customers when you add starting points. You decide when and how to announce your program.
Skip for now moves on without adding anything. You can come back to this from Opening balances at any time, though it is easier before customers start earning: someone who already has EarnKit points cannot be imported and needs an adjustment instead.